Order tests
Before you can order tests, you must first search for a patient or register a new patient. If you registered a new patient, skip to Select and add tests.
When you select New Order  for
an existing patient, a pop-up window opens where you
will enter the new order information.
for
an existing patient, a pop-up window opens where you
will enter the new order information.
- Enter a Visit Number
to identify this visit for the patient.
If your system auto-generates this number, skip this step. Each new order for the patient should include a unique visit number. A patient should have one Medical Record Number but may have multiple visit numbers in the system. - Enter the physician name, and the results filter automatically. Select the correct physician from the results.
If the physician is not found, select Add New Physician
 , enter the physician name, and select Save Physician.
- If you want to also email and/or fax the results to a specific recipient, switch the Request results via email to additional recipient and/or Request results via fax to additional recipient toggle(s) to on, and enter the email and/or fax information. If the physician is the email or fax recipient, select the Same as Physician checkbox.
- Select Save to proceed with selecting and adding tests.
If you do not wish to save the order you have started, select Cancel; any information that has not been saved will be discarded.
Tip: Select the Order History link on the right side to view a history (up to one year) of all previous orders for a patient to avoid duplicate orders. The history will also display inactive tests. However, any test that is no longer available in Order Entry will not display.
You can select and add a test by doing any of the following.
- Enter the exact test number in the Add by Test Number field.
- Select Add.
- Enter the first few characters from a test name, test number, or test mnemonic/synonym in the Search ARUP LTD field.
- Select Search or press
Enter.
The system displays a list of tests found that meet the search criteria. - Select the Add link next to the desired test(s).
- Select Close when you are finished
selecting tests.
See Adding tests using Test Directory for additional information.
- Select Quick List.
- Select the Add
link(s) to choose one or more test(s).
Links change to Added after selected.
The same test may be added more than once to the order by selecting Added. - Select Close
when you are finished selecting tests.
The test(s) are added to the order and the Specimen Collection fields are displayed.Note: Quick lists are set up under the Settings tab. See quick lists for more information.
- Select Test Packages.
- Select the Add
link(s) to add the all of tests contained in one or more packages.
Links change to Added after selected.
The same package may be added more than once to the order by clicking Added. - Select Close
when you are finished selecting tests.
The tests in the packages are added to the order and the Specimen Collection fields are displayed.Note: Test packages are set up under the Settings tab. See test packages for more information.
Note: Time-sensitive tests display a red stopwatch icon next to them and include a Time Sensitive Shipping Guide link to shipping instructions.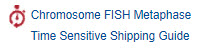
As you add each test, you will enter the specimen collection information.
The Test Name is displayed and may not be changed.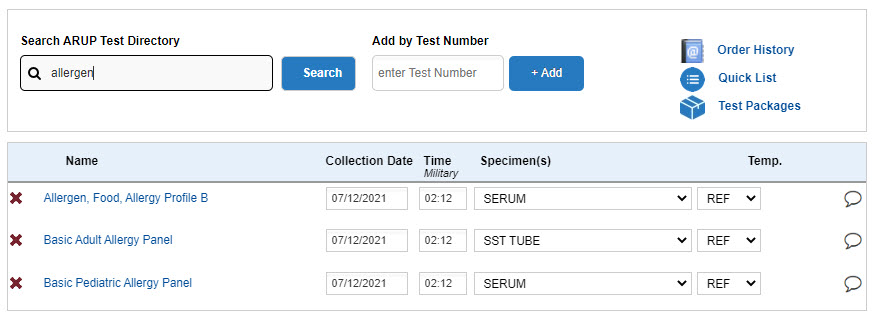
- Collection Date / Time. Enter the specimen collection date (MM/DD/YYYY) and time (HH:MM). You can enter just the numbers without slashes as the system will automatically format the date and time. For example, 021611 will be formatted 02/16/2011 by the system. If the collection date is today, you can type the letter "T" to insert today's date. For yesterday's date, type the letter "Y". If the collection time is now, you can type "N" in the time field.
- Specimen(s). Choose the correct specimen from the drop-down list.
- Temp. The temperature is automatically selected according to the specimen you chose. You may choose another temperature; however, you will only be able to choose from acceptable options for this test and specimen type.
Tip: View the Order Entry Status Icons page for descriptions of the icons that may display for a test.
Prompt tests
If the test chosen requires more information, an alert icon is displayed next to the
test. Click the icon to open the prompt fields. The fields you see depend
upon the test ordered. Fields marked with the
is displayed next to the
test. Click the icon to open the prompt fields. The fields you see depend
upon the test ordered. Fields marked with the  icon
are required. Complete the required information for the fields shown and
click Save.
icon
are required. Complete the required information for the fields shown and
click Save.
If the test chosen has missing information that is not required, a yellow
alert icon is displayed next to the test.
Below are examples of prompt fields and how you can enter the information
Hours Collected – You have two options for entering Hours Collected information.
- Enter Numeric Value. Enter the number of hours the sample was taken.
- Select Value from List. Choose one of the options from the drop-down menu.
Total Volume – You have two options for entering the Total Volume information.
- Enter Numeric Value. Enter the number of hours the sample was taken.
- Select Value from List. Choose one of the options from the drop-down menu.
Printing labels is optional.
- Before you confirm orders and print labels, review the list
of tests entered.
You can make changes now if needed. - When you are finished entering specimen information, select Save.
The specimen information will save and the specimen labels will print. - Apply the labels to the specimen containers.
If for any reason you need to reprint a specimen label, select the Label Reprint tab at the top of the window and select the labels you wish to reprint. - Select the Packing List tab at the top of the window when you are ready to print packing lists for the shipment and to transmit the orders electronically to ARUP.