Schedule a report
On the Make Report tab, choose a report from the Select a Report menu. See Available reports for information about each report.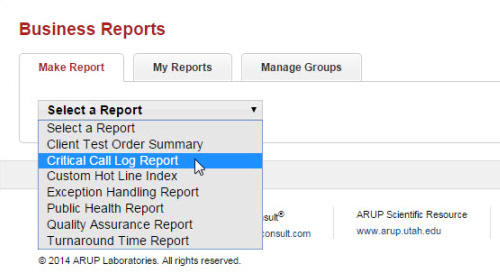
Two side tabs appear. You will use the Schedule Report side tab to complete this process. 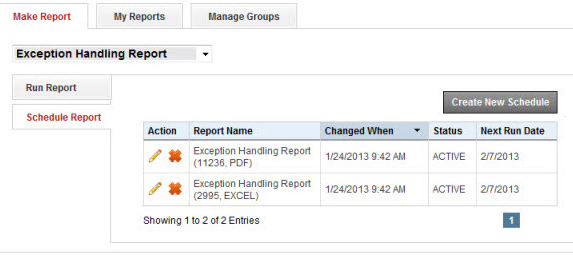
- On the Schedule Report tab, select Create New Schedule.
- In the fields that appear, enter parameters for the report. See Schedule Report parameters below for detailed information.
- Select Save. The new scheduled report appears in the list.
Each report uses some of these fields. No report uses them all.

|
Select Client or Group, and select the client or group that will show in the report. See Manage groups for information about setting up groups. |
|
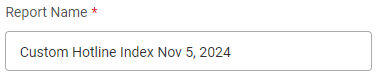
A default name is entered for the report. If needed, delete it and enter a new name. Maximum length for the report name is 50 characters. |
|
|
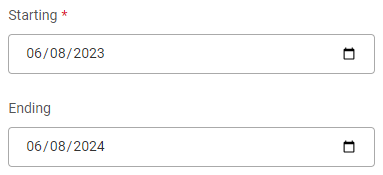
Select the start and end dates for the report to continue generating. Leave the Ends field blank to allow the report to continue generating indefinitely. |

|
Select the frequency of report generation and the date for the report to generate. Note: The date of the month when report data is available varies
based on the report: |
|
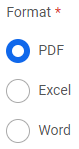
Select the report format. |
|
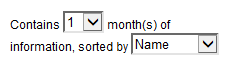
Select the number of months to include in the report. Select how the report data will be sorted. |
When you select the Schedule Report tab, you will see existing reports you have created.
- ACTIVE status - The report has run or will run until the next run date.
- PENDING status - The report has not yet run.
- EXPIRED status - The report will no longer run (the scheduled ending date has been reached).
Select the edit icon  to edit the report. Select the delete icon
  to delete the report.