Search for a patient
On the Patient Search tab, you can search for a patient, view and print their chart, add or cancel a test, and more.
- On the Patient Search tab, use the search fields. Your search results will only include records that match all of the search criteria entered in the fields.
- In order to search, you must at least enter criteria in the first field with either Patient Identifier or Patient Last Name selected.
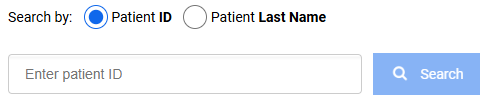
- If you select the Patient Last Name option
 or the Advanced Search button
  , more search fields become available. Use these fields if needed.
 - Select Search. The search
results display in the lower portion of the page.
Note: If you are unsatisfied with the results after selecting Search, you can enter additional criteria in the Advanced Search fields and select Search again. Changing search criteria does not clear existing results from previous searches until Apply Filters or Cancel is selected.
- When you've located the correct patient, select the Open Details link in the Action column. All tests ordered for the patient display, including tests that have been canceled by ARUP or by the client.
- Select the Standard or Enhanced link in the Results column.
- A PDF file of the chart opens in your default browser. For detailed information, see Access patient charts.
After searching for and selecting a patient (see steps 1-3 above), you will see the patient's orders.
- Select an order to expand the order tracker.
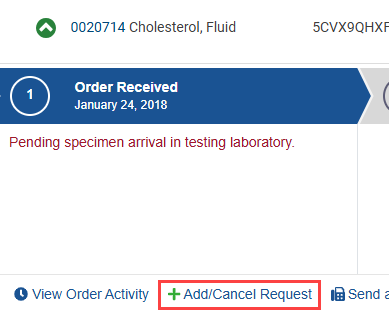
- Select Add/Cancel Request. See continued instructions for adding or cancelling a test.
Note: If the test has an exception, a Resolve Order Issue option appears. Select Resolve Order Issue to resolve the exception in eExcept. If the test requires a quality check, a Respond Now option appears. Select Respond Now to provide the required information.
|
Field |
Requirements |
|
Patient Identifier |
May be searched alone. |
|
Patient First Name |
Must be entered with a Last Name. |
|
Patient Last Name |
May be searched alone. Must include at least two characters. |
|
Date of Birth |
Select the date of birth in the drop-down calendar. |
|
Test Name or Test Number |
Enter the full or partial valid test name or number, and select the correct test name in the drop-down that appears when you start typing. |
|
Collection Date Range |
Enter a collection date range. |
|
Client ID |
Select at least one client in the drop-down list. |