Fax test results
- Search for and select the patient on the Patient Search tab.
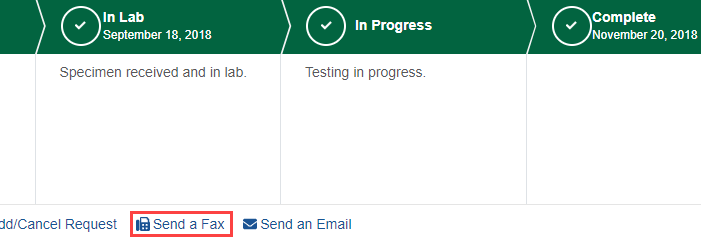
- Select the row of the completed test to expand the order tracker.
- Select Send a Fax.
A dialog box appears.
- Enter the recipient's information in the Secure Fax Number, Last Name, and First Name fields.
- In the Contact Number fields, enter your phone number so Client Services can contact you if more information is needed. These fields are optional; your phone number is not required to fax test results.
Note: If a phone number is already listed on your Connect account, Client Services can use that number to contact you.
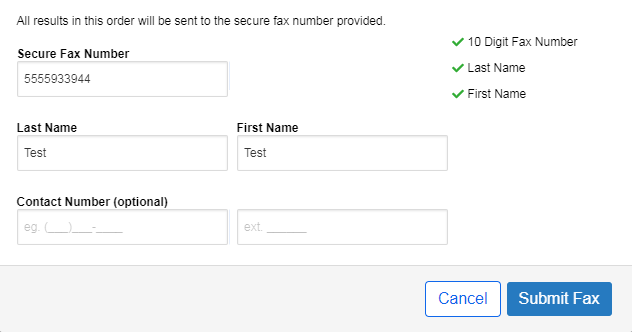
- Select Submit Fax.
Note: Fax requests do not change the status of the result to Viewed.
Note: If a test result chart is corrected after you request the fax, the chart is automatically re-faxed.
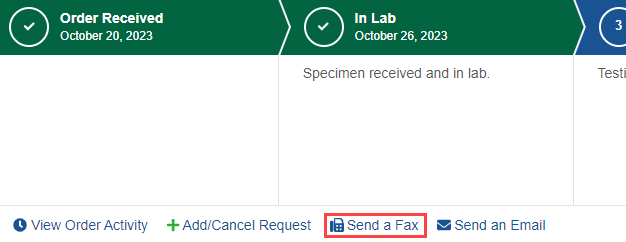
- Search for and select the patient on the Patient Search tab or locate the test in progress on the Pending tab.
- Select the row of the test in progress to expand the order tracker.
- Select Send a Fax.
A dialog box appears.
- Enter the recipient's information in the Secure Fax Number, Last Name, and First Name fields.
- In the Contact Number fields, enter your phone number so Client Services can contact you if more information is needed. These fields are optional; your phone number is not required to fax test results.
Note: If a phone number is already listed on your Connect account, Client Services can use that number to contact you.
- Select Submit Fax.
Note: Fax requests do not change the status of the result to Viewed.