Set up site notifications
Select Admin, and go to the Notifications tab to manage critical notifications in your Gateway site. Notifications from Gateway Admins to users in their directory, are for critical notifications only.
A site wide notification appears when a user first visits a Gateway site. The notification displays with each new browsing session. Only one active site wide notification is allowed at a time.
- Select +Add New Notification
 . The Notification Builder dialog box appears.
 - Enter a start date and end date.
- Enter a subject if needed.
- Select the Site Wide option.
- Enter the notification text in the Message field. See the Editing tool for information about modifying the format of your text and adding links, anchors, images, documents, videos, and tables.
- Select Save
 .
.
Note: The end date is inclusive, and the notification will end after 11:59 pm server time.
A test specific notification appears when a user first views a test. Only one active test specific notification per test is allowed at a time.
- Select +Add New Notification . The Notification Builder
dialog box appears.
- Enter a start date and end date.
- Enter a subject if needed.
- Select the Test Specific option. A test entry box appears.
- Enter all test(s) you want included on the notification.
- Enter the notification text in the Message field. See the Editing tool for information about modifying the format of your text and adding links, anchors, images, documents, videos, and tables.
- Select Save .
Note: The end date is inclusive and the notification will end after 11:59 pm server time.
- Enter your search criteria in the Search Notifications search field.
- Select Search. The search results display.
You can edit notifications that are not currently active. For active notifications, you can only edit the End Date. The  icon indicates that a notification is currently active.
- Select the notification you want to edit. The Notification Builder dialog box appears.
- Make any changes and select Save . The notification is updated.
You can delete a notification that is active, occurred in the past, or occurs in the future.
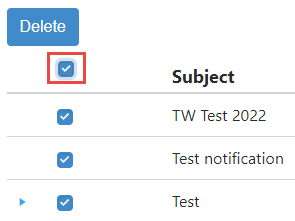
- Locate the notification(s) you want to delete.
- Select the checkbox next to the notification(s). Once you have selected at least one notification, the Delete button becomes active. You can select individual notifications or select the checkbox next to the Subject column header to select all notifications.
- Select Delete
 . The Delete Notifications dialog box appears.
 - Select Delete . The notification(s) is deleted.
You can disable a notification that is currently active.
- Select the notification. The Notification Builder dialog box appears.
- Select Disable
 . The notification is disabled and will no longer appear for users.
Two types of notifications may display for a Gateway administrator when they log into their Gateway site:
-
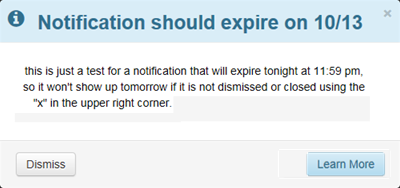
Informational
This type of notification is informational and displays in blue.
-
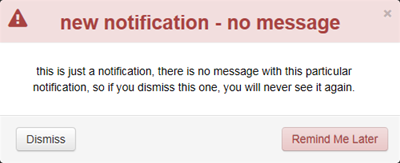
Warning
This type of notification is a warning and displays in red.
Select the Learn More button to view the message that is associated with the notification.
Select the Remind Me Later button to be reminded about the notification the next time you log in.
Select the Dismiss button to dismiss the notification.