Customize your site's look and feel
Select Admin, and go to the Settings tab to customize the look and feel of your laboratory test directory.
Select Save at the bottom of the page when you are finished updating your settings.
Select the following links for step-by-step instructions:
Add logo, header background image, and favicon
In the Logo, Header Background Image, or Favicon areas, select the Select file...  button to search for and select an image.
Note: The favicon is the icon that displays in the favorites and browser tab.
For best results:
- The favicon should be an .ico file and either 32x32 px or 16x16 px.
- If the logo is larger than 450px wide and/or 110px high, the image will be automatically re-sized.
- The header background image should be 1000px wide by 130px high.
Your image will save when you select Save at the bottom of the page.
Set logo link
You can make your logo image a link to a web page by setting a logo link.
- Select the Set Logo Link hyperlink next to the Logo field. The Logo Link dialog box opens.
- Enter a valid URL.
- Select Save
 .
. - Select Cancel
 to close the Logo Link window.
Your link will be saved once you select Save at the bottom of the page.
Delete logo link
You can remove the logo link URL by selecting Delete  on the Logo Link window.
Delete logo, header background image, or favicon
- Select the Delete Logo, Delete Header Background Image, or Delete Favicon checkboxes.
- Select Save at the bottom of the page.
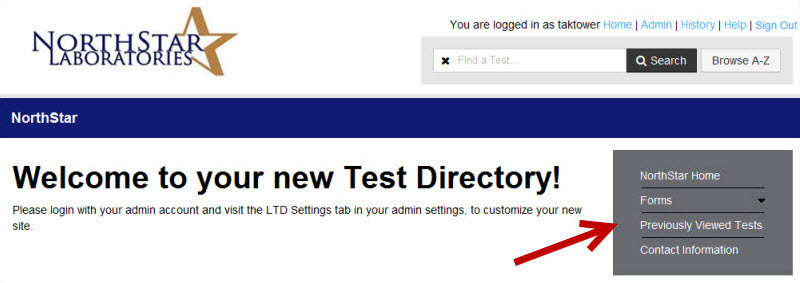
In the Test Directory Display Name field, enter a name for your test directory. This name will be displayed on the home page as "[Test Directory Display Name]".
In the Days to display test status field, enter the number of days the test status (New/Updated) will be displayed next to new or updated tests in your test directory.
The Notifications toggle switch  enables or disables the pop-up notifications that appear when a change has been made to a test in the test directory.
Note: The Notifications toggle switch is turned on by default.

The Search Suggestions toggle switch controls whether search suggestions are visible when a term is entered in the Search field.
Note: The Search Suggestions toggle switch is turned on by default.
The Prioritize Client Managed Tests toggle switch prioritizes whether client-managed tests display above ARUP-managed tests in the search results when searching for a test.
Note: The Prioritize Client Managed Tests toggle switch is turned off by default.
Select  to expand the Color Settings section.
- You can change the color settings of each area of your test directory by using the color palette or by entering the HTML color code into the display fields.
- Select
 next to the display field, if available, for an example of how editing
the color of that field will change the color settings of your test
directory. You can see all the color settings examples here.
next to the display field, if available, for an example of how editing
the color of that field will change the color settings of your test
directory. You can see all the color settings examples here. - Select Restore Default Color Scheme to restore all your color settings to the default colors.
Select to expand the Slideshow section.
Use the Manage Slideshow Images section to build a slideshow that you can display on your home page.
Build a slideshow
Note: Important! The file name for images that you upload here should not have spaces or special characters. File sizes must be less than 30mb.
- Select the Active checkbox.
- Select the slideshow position from the drop-down list (above or below).
- Enter the height (in pixels) of your tallest image in the Height box.
- Select the Select files...
 button.
 - Select your image files and select Open in your browser's dialog box.
- Select Upload
 .
. - Select
 . The Edit Slideshow Image dialog box opens.
 - Add a caption and modify the caption color options as needed.
- Select Save .
- Repeat steps 7 through 9 for each image as needed.
- Select Save at the bottom of the page.
Add links to captions
To add a link to a caption, add the HTML code to the Caption box and select Save .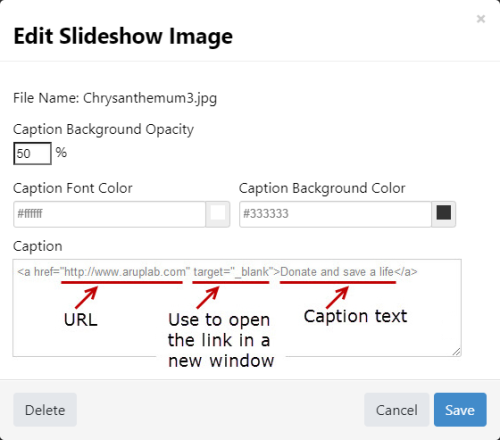
Example Code:
<a href="http://www.aruplab.com" target="_blank">Donate and save a life</a>
The Home Page HTML text box controls the content displayed on the home page of your test directory. Enter the content you want displayed on your home page here, or copy and paste the content from another application. Before you select the text box, it will display in HTML. When you select the text box, the editing tool will display. Use the editing tool to format the content of your Launch Page.
In the Manage Sidebar and Footers section, you can add a link as a sidebar or footer.
- Sidebar: These links will appear in a list on the right
side of your home page.
- Footer: These links will appear at the bottom
of every page.
Add a link
- Enter the Title. The title is the text that will display for your link.
- (Optional) Select the Is Parent checkbox if the link you are adding will be used as a parent for sub-links.
- Enter a valid URL or select a Document to link to from the drop-down menu. To choose a document from the drop-down menu, you will first need to Upload a new document.
- Assign the link to be a Sidebar or Footer by using the Sidebar or Footer drop-down menu.
- (Optional) Choose a header from the Parent Title drop-down to assign your new link to display as
a sub-link to the header. See Create a parent/header for sub-links for instructions.
- Select +Add
 .
.
Note: You will need
to scroll down to Sidebar\ to find your document if you use the Select files... button
in the Links section.
Create a parent/header for sub-links
- Select the
 checkbox.
 - Enter the title of the header in the Title field.
- Select +Add .
Your header is now available to use as a header for sub-links.
You can also change a link to be a parent/header by selecting the
row of an existing link, and selecting in the
Edit Link dialog box. This
will clear out any existing link data except for the title because
parent/headers will not link to documents or URL's.
Assign sidebar links to be sub-links
Assign any Sidebar link to appear as a sub-link on your home page.

You may not create sub-links with Footer links.
- Add a link and assign your link to
a Link Header.
OR
Select the row of the Sidebar link you want to assign as a sub-link. - Select the Parent/Header from the Parent Title drop-down list.
- Select Save .
Your link will now display as the parent link name listed in the Parent column on the table.
Upload a new document
Note: Important! The file name for documents that you upload here should not have spaces or special characters. File sizes must be less than 30mb.
- Select the Select files... button. The Document Upload dialog box opens.
- Select the file and select Open.
- Repeat steps 2 and 3 as needed.
- Select Upload
when you have added all the files.
Edit a link
- Select the row of the link you want to edit. The Edit Link dialog box opens.
- Edit the Title, URL, Sidebar or Footer, Parent Title or Document as desired.
- Select Save .
Delete a link
- Select the row of the link you want to delete. The Edit Link dialog box opens.
- Select Delete
 .
.