My Account
Select My Account from the user menu in the top right corner of Connect.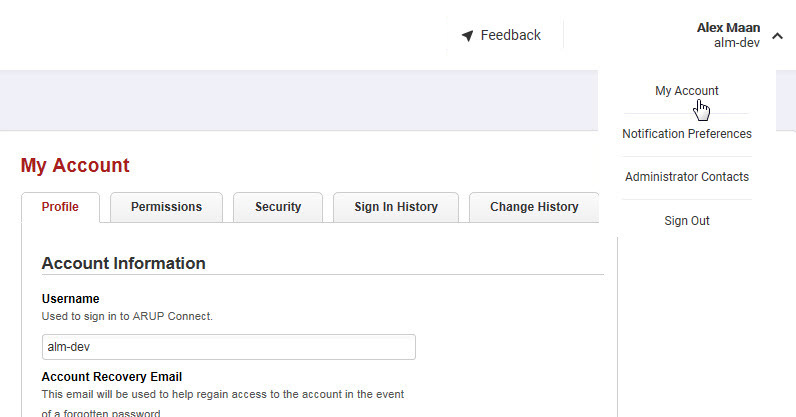
On the My Account page, you can update your profile information, change your password, change your password recovery question, and unsubscribe from permissions.
On the Profile tab, view or modify your profile information. Your notification email can be different from your account recovery email. Select Save when you're finished.
If you are an administrator, skip to the Permissions (Administrator) section.
Your administrator assigns permissions to you. However, you can remove permissions you don't want. Select the Permissions tab to display your current permissions.
Hover over the info icon  for a brief description of a service.
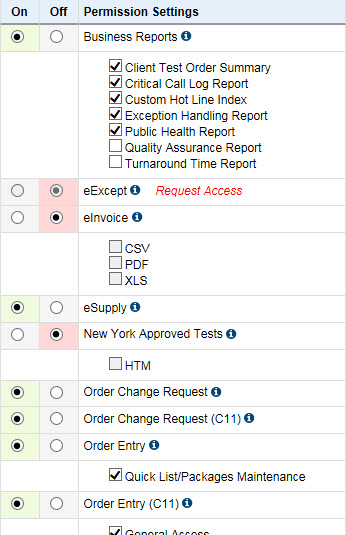
Remove permissions
- Select the Off option next to the service(s) you want to remove.
- Select Unsubscribe. (You may also select the Unsubscribe from all Services button to unsubscribe from all services.) A message displays asking you to confirm that you want to remove the services you have chosen.
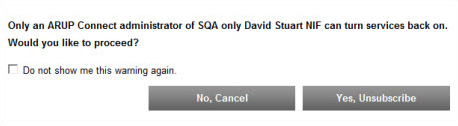
- Select No, Cancel if you do not want to make any changes.
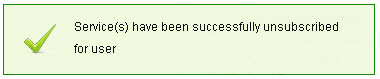
- Select Yes, Unsubscribe to confirm that you want to remove the services you selected. A message informs you that the services were removed and will no longer be accessible in your list of permissions. If you remove a service that you need, call your administrator to have the permission added back to your list.
On the Permissions tab, view or modify permissions. You can edit your permissions for specific services under designated Client IDs. Hover over the info icon for a brief description of a service.
Manage permissions
- Select On or Off next to a service to add or remove it. Administrators and user administrators can select Unsubscribe from all Services to unsubscribe from all services.
- When you are finished updating permissions, select Update.
A message notifies you if the account was updated successfully. If the update failed, check to ensure you have entered information in all required fields and selected at least one document type for services that require it, and then select Update again.
Private Options. Some of the services available to ARUP clients are labeled "Private." These services are only available to certain clients under specific circumstances. For example, the ARUP Gateway private service is available to clients who take advantage of this customizable online laboratory test directory through ARUP. If you have been granted access to a private service, it is not automatically selected. You will need to select the check box if you want this service to appear in your Connect menus. As with other options, some private services will also require you to select a document type such as PDF, XLS, etc.
Select the Security tab to change your password or your password recovery question.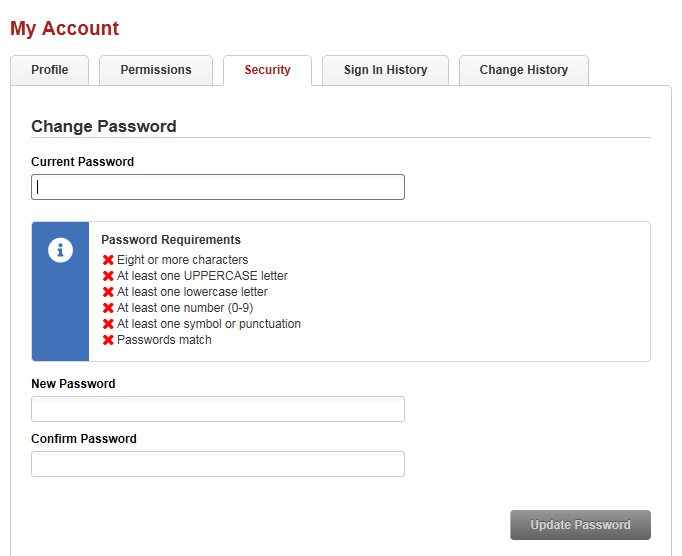
Change password
- In the Current Password field, enter your current password.
- In the New Password field, enter the new password. As you meet the requirements in the Password Requirements area, the
 icons update to
  .
. - In the Confirm Password field, enter the new password again.
- Select Update Password.
Note: You cannot reuse the same password within eight password changes. If you attempt to do this, the system will prompt you to choose a different password.
Change password recovery question
The first time you log in to ARUP Connect, you are required to set up a password recovery question and answer. If you forget your password in the future, you can reset your password by correctly answering the password recovery question.
On the Security tab, you can change your password recovery question and answer at any time.
- Enter your current password in the Current Password field.
- Select a question in the Question drop-down menu, and enter an answer you will remember in the Answer field.
- The answer cannot use any word from the question.
- The answer cannot use your username or password.
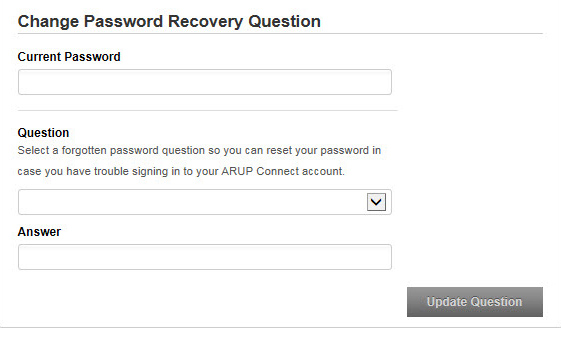
- Select Update Question.
Select the Sign In History tab to view your last 100 attempts to sign in to ARUP Connect and Gateway.
- In the Refine By area, select the Failed login or Successful login check boxes to filter the list accordingly.
- Use the Start Date and End Date fields and then select Update to filter by a date range.
- Right click the list and select Print to print.
Select the Change History tab to view all updates made to your account.
- Select the View History For drop-down menu to select a different client ID.
- In the Refine By area, select an Action and/or Service to filter the list accordingly.
- Use the Start Date and End Date fields and then select Update to filter by a date range.
- Right click the list and select Print to print.