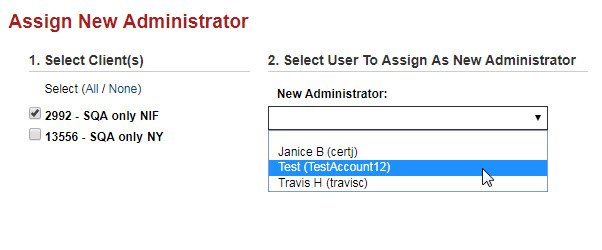
Assign New Administrator
When you assign a new administrator, you give them your own administrator duties and remove rights for yourself.
Note: When you access any User Administration page, you are prompted to verify your account with email authentication. Follow the on-screen instructions to complete this process. The authentication email goes to your account recovery email address.
- In the User Administration
menu, select Assign New Administrator.
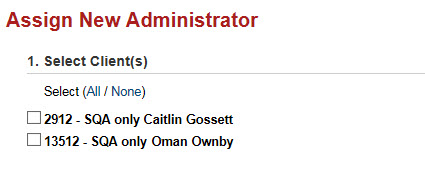
A page opens with a list of the clients for whom you are an administrator.
- In the Select Client(s) section, select the check box for each client ID you want to assign to a new administrator.
Note: If you are administrator for only one client ID, you will not see step 2 as described above. Skip to step 3.
- From the
New Administrator drop-down, select the name of the user to be
the new administrator. You can type the first characters of the user’s
name to scroll quickly to that name and select it in the list.
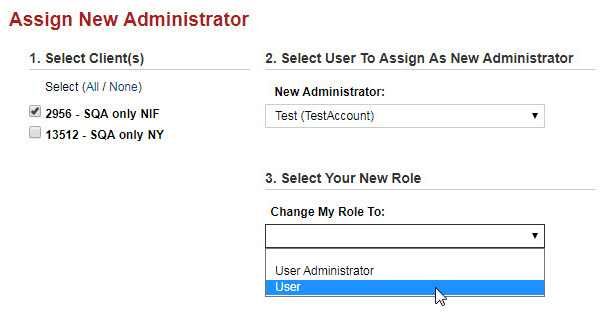
The Select Your New Role section appears. -
From the Change My Role To drop-down, select your own new authorization level for the selected client ID(s): User Administrator or User.
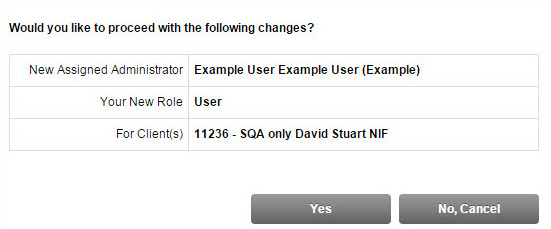
A warning message displays the updates for the selected client ID(s) if you proceed. -
Select Yes to complete the assignment. Select No, Cancel if you do not wish to complete the assignment.
The Select User To Assign As New Administrator section appears.
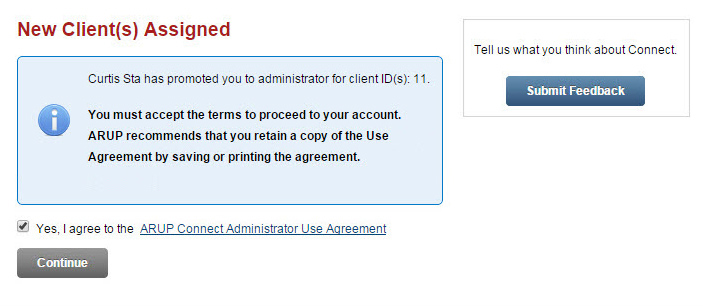
When the new administrator next logs in to ARUP Connect, they will need
to confirm that they accept the assignment as administrator. They should
first select the link to read the ARUP
Connect Administrator User Agreement. Then they should select the
check box and select Continue.
After the new administrator selects Continue,
the system displays the main ARUP Connect page including the Administrator
menu options.