Upload multiple tests
Go to Admin > Upload Tests. Follow the steps below to upload multiple tests from an Excel or CSV spreadsheet and supporting files. The Step Flow displays the current step you are on as you move through the process. 
Tip: Select the download the Excel file Upload_Template.xlsx or download the CSV Upload_Template.csv links to use a template for creating your spreadsheet.
In your Excel (.xlsx or .xls) or CSV (.csv) spreadsheet, do the following:
-
In the first row, enter field names for every field (column headings).
- Include columns for Test Number, Test Name, ARUP Test Number, Test Managed by, and Use ARUP Test Name (these are required fields).
- Include a column for every field in your laboratory test directory, including custom fields.
-
Add a row for each test and include the information for each column, as needed.
- Include the file name for any document or image files you want included with the test, including the extension (for example, documentname.pdf, imagename.jpg). For a list of file and image type options, see supported document and image file types.
 Spreadsheet details
Required fields
Test Number: Test number or test code that will display in your test directory. It is searchable and can be changed, even on ARUP Tests.
Test Name: Test name that will display in your test directory. It is searchable and can be changed, even on ARUP Tests.
ARUP Test Number: If the test is an ARUP managed test, you want to display the ARUP Consult disease topic, or you want to import any ARUP test information for your own client managed test, you must provide the ARUP test number here.
Test Managed by: This must be populated with either Client or ARUP to indicate who manages the test information for this test. If you indicate it is managed by ARUP, then we will update this test with our test information on a nightly basis. If you indicate it is managed by Client, then you are responsible for populating and maintaining this test information. You can import ARUP test information as a baseline by entering Yes in the Import ARUP Test Information column in the spreadsheet template, and then include any changes in test information that isn’t appropriate for your test.
Performing Lab: If this test is managed by ARUP, then we will update this field with our lab information on a nightly basis. If you indicate it is managed by Client, then you are responsible for populating and maintaining this field. This field displays on the results page when searching for tests.
Use ARUP Test Name: If you have a test number in the ARUP Test Number field, then you will need to indicate with a Yes or a No whether you want to use ARUP’s test name.
Other spreadsheet details
Display ARUP Consult: If you would like to display the ARUP Consult decision support information on a client managed test, enter Yes in this field and enter the ARUP test number in the ARUP Test Number field.
Start Date: Date a test will be or was activated.
End Date: Date a test will be or was inactivated. An inactive test cannot be viewed by anyone who is not signed in. Inactive tests remain in the test directory. Only when a test is deleted will it no longer be available in the directory.
Test Search Categories: Act similar to filters for your test directory. You can create as many search categories that are useful to you and your audience; include a semicolon (;) between the search categories. You do not need include spaces. One test can reside in many test search categories.
CPT: You can add as many CPT codes as you want to client managed tests; include a semi-colon (;) between the codes. You cannot change or add CPT codes to ARUP Managed tests. CPTs are also searchable.
LOINC: You can add as many LOINCs as you wish to client managed tests; include a semi-colon (;) between the codes. You cannot change or add LOINCs to ARUP Managed tests. LOINCs are also searchable.
Related Information: Displays hyperlink text that takes the audience to a specific URL. It requires that you provide the name of the link, a comma, and then the URL (for example, name of your link, www.aruplab.com). You can add as many links as you want to any test; include a semi-colon (;) between the links.
Submit with Order: Displays hyperlink text that takes the audience to a specific URL. It requires that you provide the name of the link, a comma, and then the URL (for example, name of your link, www.aruplab.com). You can add as many links as you want to any test; include a semi-colon (;) between the links.
Synonyms: You can add as many synonyms as you want to any test; include a semi-colon (;) between the synonyms. You cannot change synonyms on ARUP Managed tests, but you can add more. Synonyms are also searchable.
Additional spreadsheet information
- All other fields can include text, numbers, or formatting if you choose.
- Document or image file names must not have spaces in their names and must include the file extension (for example, document.pdf or redtube.jpg).
- Your spreadsheet should contain only one sheet.
- Your spreadsheet cannot contain any filter(s).
Select the thumbnail below to view an example spreadsheet.

Upload test information
- On the Upload Tests tab on the Admin page, choose Select file... and navigate to your test upload file then double-click or select Open. The application processes and uploads your test information.
- Any errors found in your upload file display. If you do have errors, you will need to resolve them and upload the file again before the Match Fields option becomes active and you can go to step 3. Match your test upload file fields with your test directory fields.
Upload supporting documents/images
If you don't have any supporting documents or images to upload, go to step 3. Match your test upload file fields with your test directory fields.
- You can select and drag your files to the Drop files here to upload area or choose Select files... to navigate to your file(s) and double-click or select Open. Continue to add all the files you want to upload. For a list of file and image type options, see supported document and image file types.
Caution: The file name (including extension) must exactly match the information in your spreadsheet
- Select Upload
 . A message displays the upload status of your document/image file(s).
- Select Match Fields
 . The application automatically
attempts to match all possible fields.
. The application automatically
attempts to match all possible fields.Note: If you do not want to import data for a field, select Ignore This Field. You can also select the Ignore All Fields link if you do not want to import any field data.
- Using the drop-down menus, match fields from your test upload file (left side) to the fields in your test directory (right side). Required fields have already been matched and cannot be changed.
Note: All matched fields will overwrite existing values except for ARUP standard fields. Search categories and synonyms will append to the current values.
The following icons display the status next to each field.

|
Field is matched. You can move to the next step. |

|
Field will be ignored. You can move to the next step. |

|
Field is not yet matched. You will need to select a field before moving to the next step. |
After making a valid selection for all fields, the Review  option becomes available and you can move to step 4. Review your test information.
- Select Review . All your current test information for upload displays for review.
- You can select column headers to sort (ascending and descending) information or select the right arrow
 next to a test to expand and view all test-specific information.
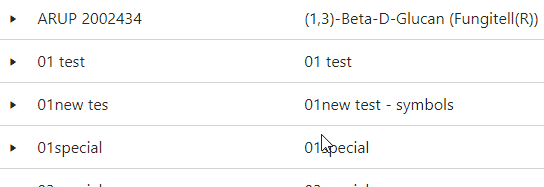
If you have any errors, the following message displays. Select download the error file TestError link to view the errors.

Note: Tests with unresolved errors will not be uploaded to your test directory.
- Select Publish. A message displays all successful and unsuccessful tests that were created or updated in your test directory. If you have any errors, you can view them by selecting the download the error file TestError link.
