Add containers
Containers are the tabs and the right margin groupings that contain the entry fields on your tests. Select the following links for step-by-step instructions:
- Select Admin, and go to the Layout tab.
- Enter a name in the Enter Container Name field under Add New Test Container.
- In the drop-down menu assign your container location to be either Tab or Right Margin.
- Tab: Displays the container as a tab. See Test detail tabs for more information.
- Right Margin: Displays the container on the right side the test. See Right Margin containers for more information.
- Select
 . The name of your container appears in the container list.
 - Assign fields to your new container. See Assign (map) fields to containers.
- Select Save at the bottom of the page.
- Select Admin, and go to the Layout tab.
- Select the row of the container you want to edit from the container list. The Edit Layout Information dialog box opens.
- Edit the Title and/or Location.
- Select
 .
.
- Select Admin, and go to the Layout tab.
- Select the row of the container you want to delete from the container list. The Edit Layout Information dialog box opens.
- Select
 .
.
- Select Admin, and go to the Layout tab.
- In the lower portion of the page in the container list, select the row of a container. The Edit Layout Information dialog box appears.
- In the Container Fields drop-down menu, select a field, and select .
- Continue to add fields as needed.
- Select . The field now appears in the assigned tab or container on all tests.
Note: If a needed field doesn't appear in the drop-down, create a custom field.
- Select Admin, and go to the Layout tab.
- Select the row of a container from the container list. The Edit Layout Information dialog box appears.
- Select the "X" on the row of the field you want to remove from the container.
- Select
Note: You cannot delete a Standard field from a container unless it has been assigned to another container.
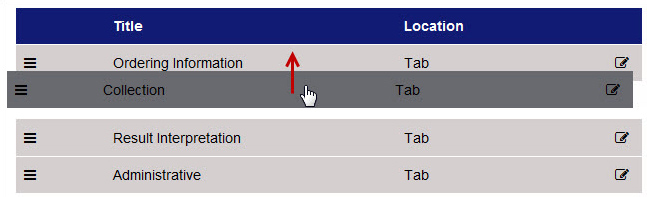
Arrange container order
- Select Admin, and go to the Layout tab.
- Drag and drop the rows in the container list.
Arrange field order
- Select Admin, and go to the Layout tab.
- Select the row of the container. The Edit Layout Information dialog box appears.
- Drag and drop the rows in the Container Fields list.
- Select .